


Never cover your car once you put it on a trailer. Never. Never ever. Don’t do this (unless there is no paint on your car).
[Read more…] about Don’t do this to your Bugeye SpriteNever cover your car once you put it on a trailer. Never. Never ever. Don’t do this (unless there is no paint on your car).
[Read more…] about Don’t do this to your Bugeye Sprite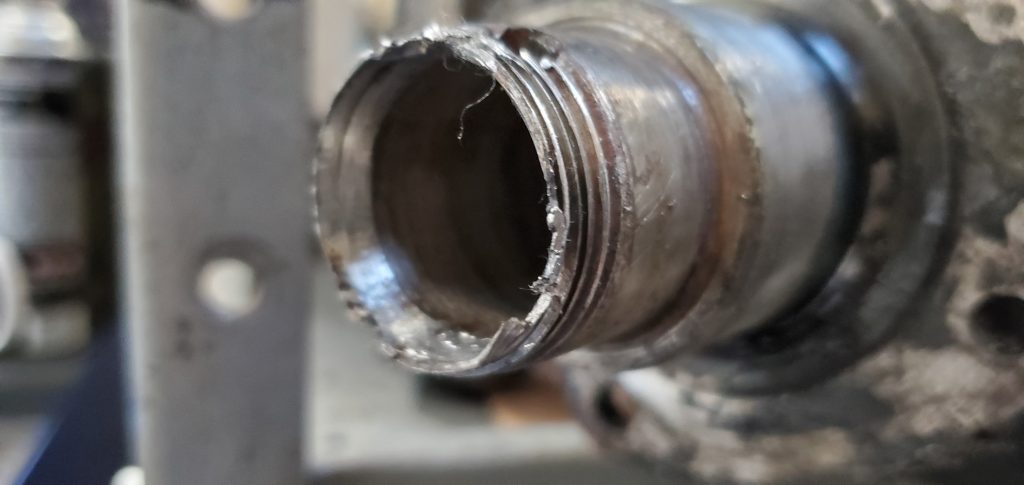
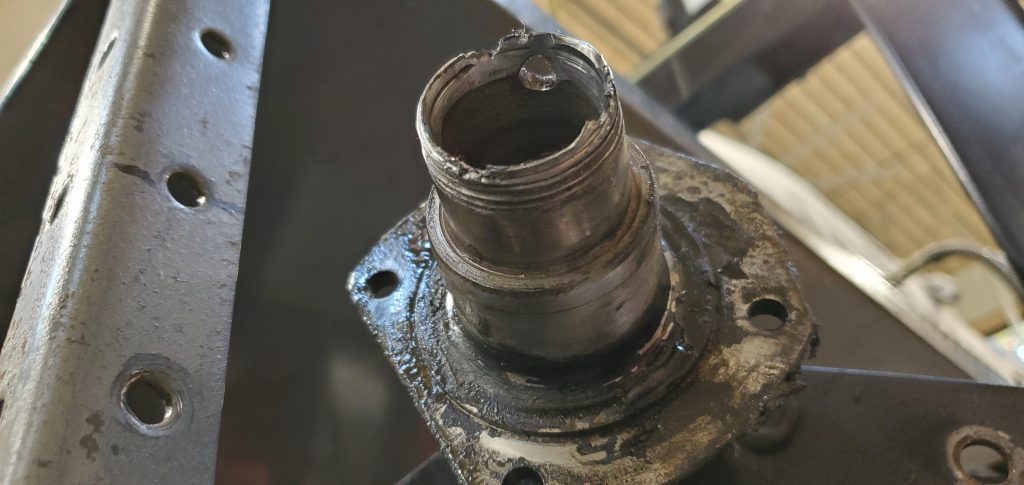
We’ve had a number of damaged rear axle threads lately. Above and below you can see the latest disaster. In this case, someone damaged the threads and then welded the axle nut in place to hold on the hub. We cut the welds to remove the nut and replace the leaking hub seal, but the axle is too far gone to re-use so we had to replace the entire assembly.
This is a reminder to be extra careful with these threads, because when they are are damaged as shown here, you need and ENTIRE new axle assembly (as shown three photos below). This is not an easy part to find.
They fail for many reasons. First, the giant nut that lives on these threads requires a special tool. A giant conventional socket will not work. You need this six-sided key, which you operate with your own ratchet handle and extension. Many people seem to use chisels to tighten these nuts, thus destroying them. Get the right tool by clicking here.

Second, the left side nut (drivers side with LHD car) has reverse threads. If you don’t know this, you might tighten and possibly strip the threads instead of loosening this nut.
And lastly, some people over-tighten these. I would use 80 ft lbs as a guide. Make sure to use the factory lock tab.
If and when you have to loosen your rear axle nuts, make sure you treat these threads with extra care!
Axles don’t break very often. Of course if yours breaks, you never forget it, and you think that they all must break, but the reality is that we have had very few broken axles during the past 15 years. Of course if you drive like an animal you could break your axle on your first drive but we always encourage people to be gentle with these old cars and that seems to work. I broke my last axle in about 1982, so now that most of us a little older and the animal has matured a bit, by design, our demographic is less apt to brake axles.
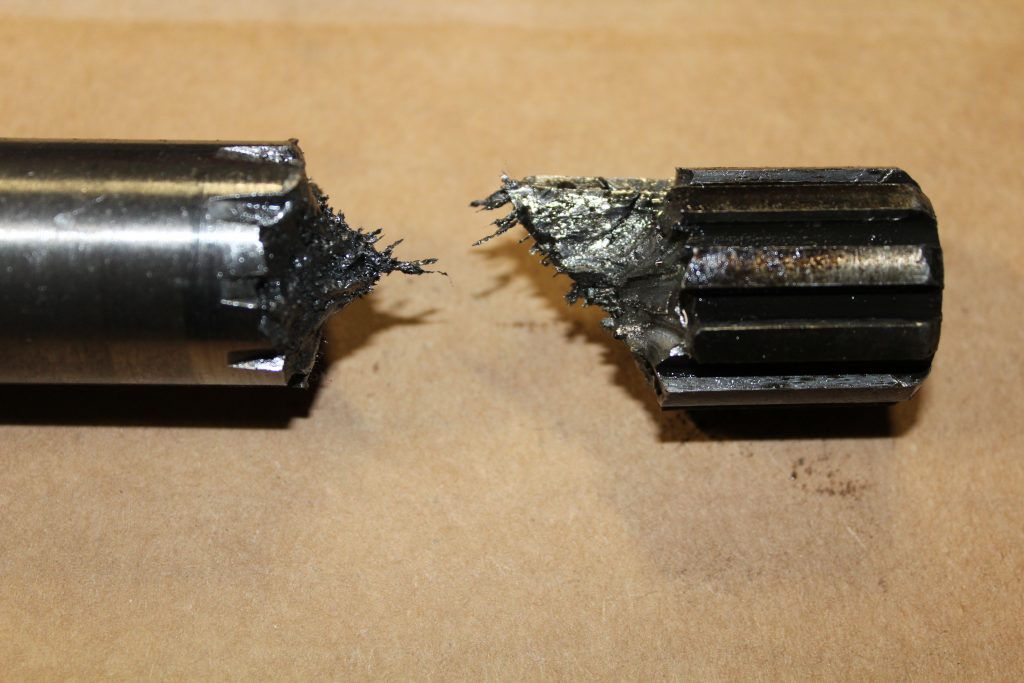
That said, Ken called this week to say his gearbox broke and his car wouldn’t move and that he needed a new transmission. After discussion, it was clear that he had broken an axle. Sadly, you need to be towed home anytime this happens. Ken was so happy with our diagnosis over the phone that he sent us this picture of his parts, which demonstrates exactly how they usually break. The outer tip that protrudes into the differential will often torque off of the axle shaft. Once an axle is severed, you can no longer send power to the wheel, and you are all done. And it can often be quite difficult to get the broken piece out of the rear end.

So don’t be an animal.
We frequently talk about the fuel tank kits we sell in our catalog and how important it is to replace the tank since so many of them in the field are very old with rust and debris that diminishes reliabilty.
This week, we had a car with a full tank of gas taking in some sun. As time went on, the gas began to expand in the tank. The wire style hose clamp that was holding the fuel hose between the tank and the filler neck became so overrun with pressure, that the clamp failed and thus leaked gas into the rear of the car and onto the ground.
Check the style of clamp that is holding the section of rubber fuel hose going from the tank to the neck. Wire type hose clamps holding that rubber hose such as these were once common and are also being provided by some of the fuel tank companies, but they are not up to the task. Instead it’s much better to have the “worm drive” or “arrow” style of hose clamp installed.
If you want the proper clamps for your fuel tank, please don’t hesitate to call or email customercare@bugeyeguy.com and we will gladly get them for you. We’ll make sure that the upgraded clamps come with all of our fuel tank kits going forward.
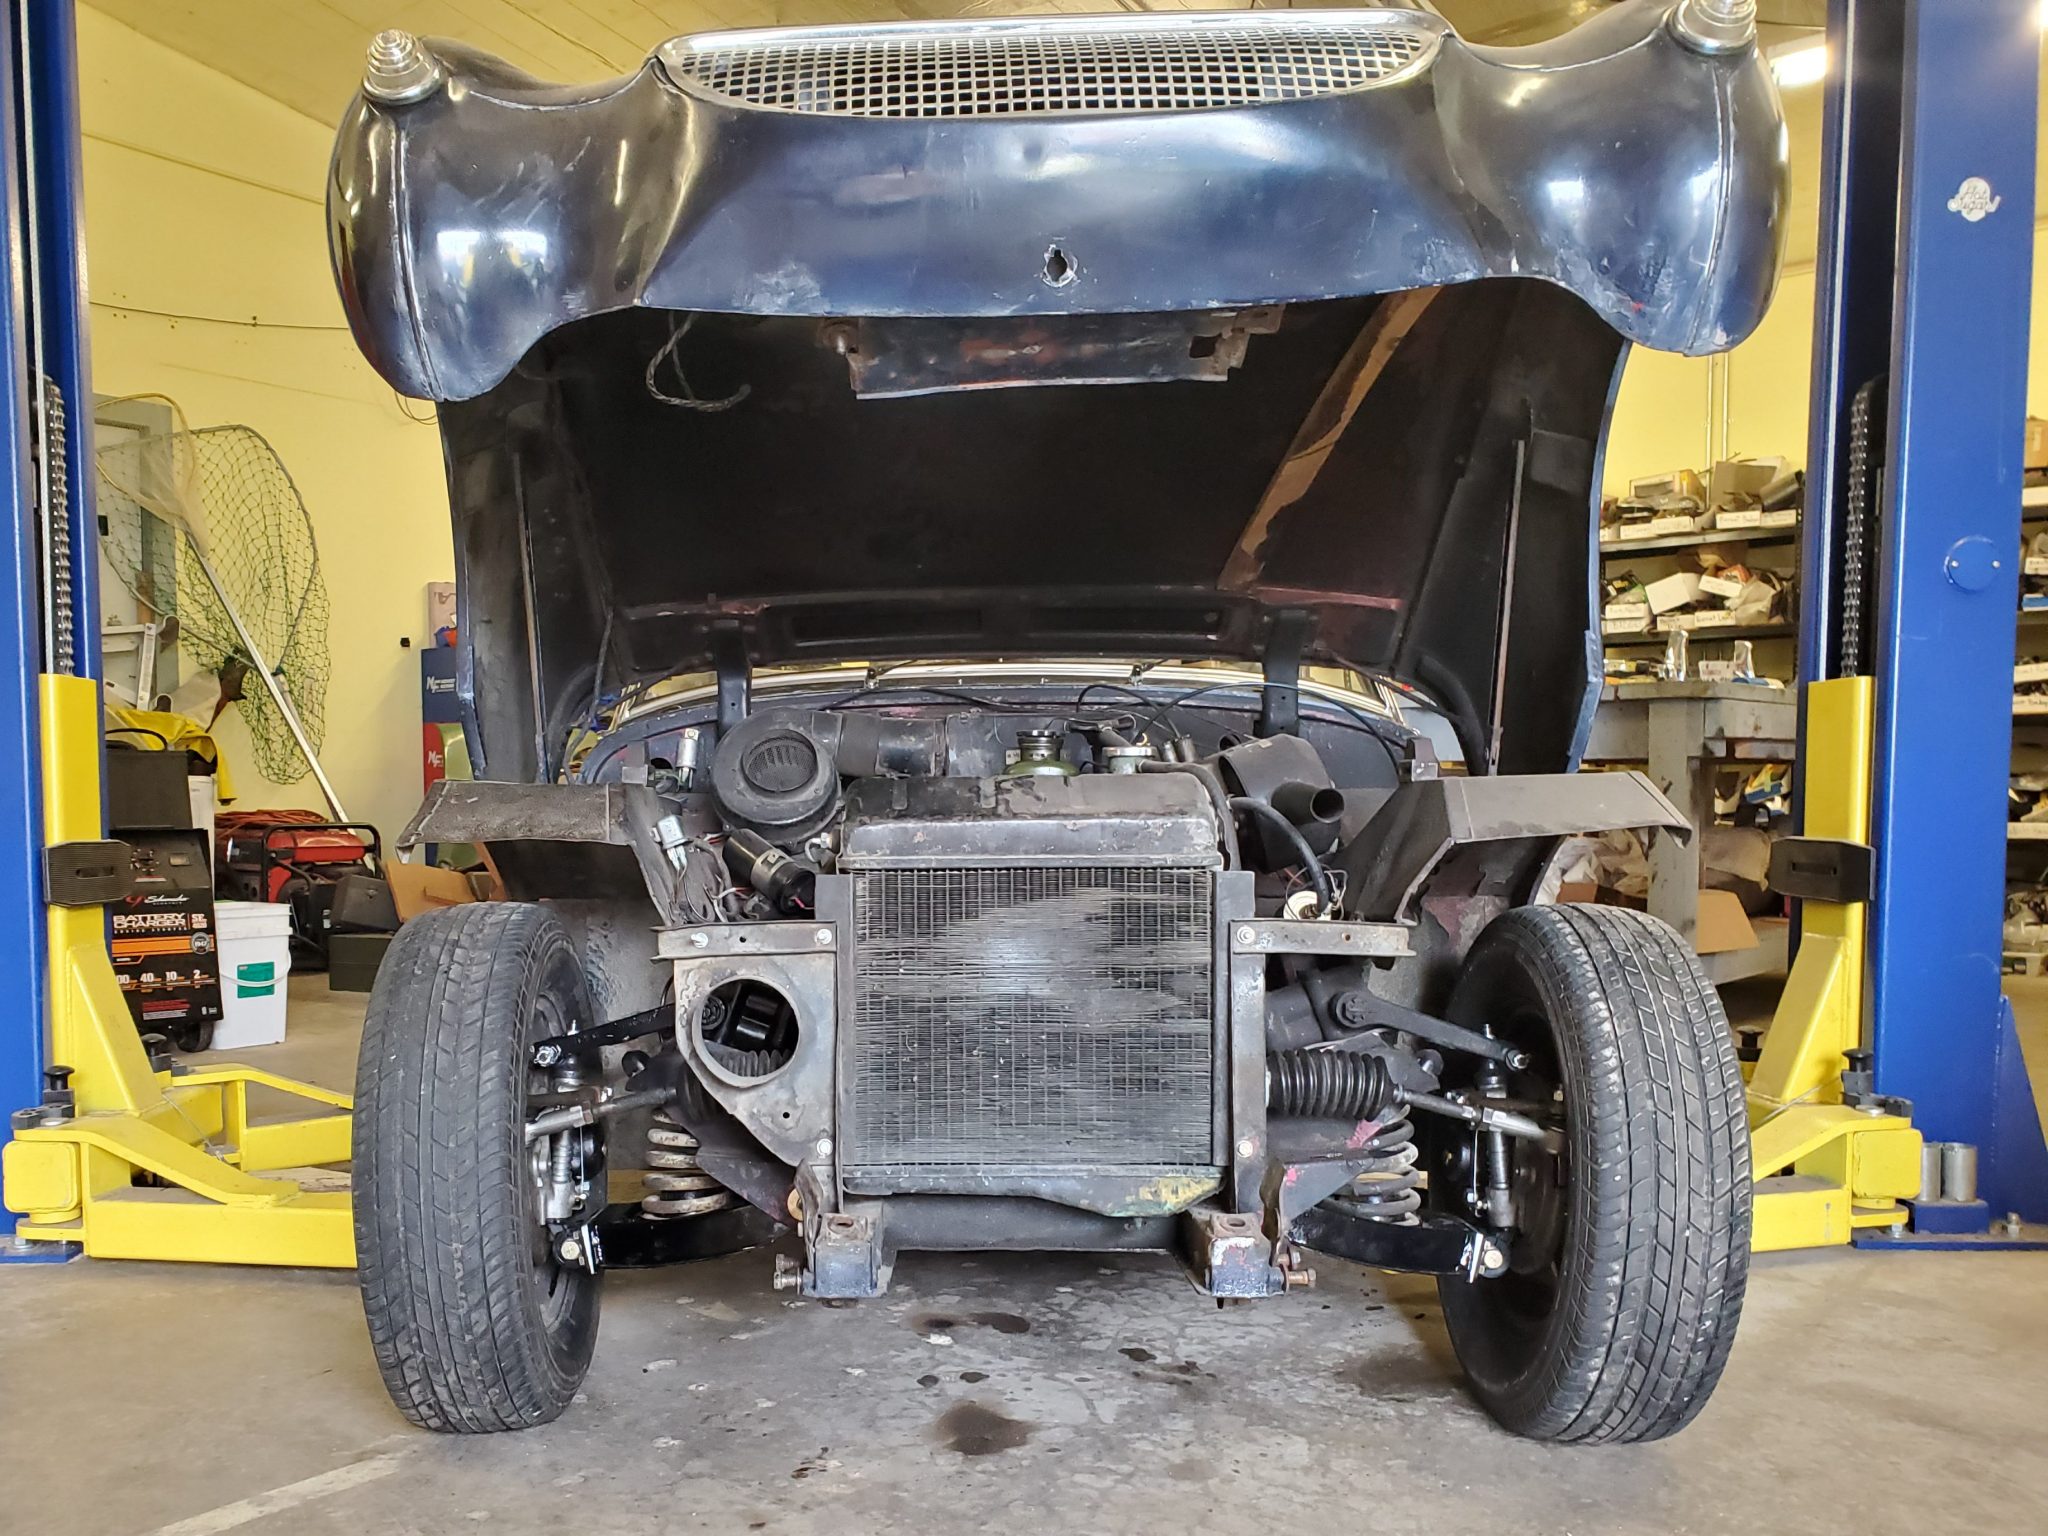
When you rebuild your front end, this is not what you want to see. Note the excessive positive camber. Something is very wrong. Since we have had two clients call with this issue that past month, I wanted to share these photos to help future builders avoid the same frustration.
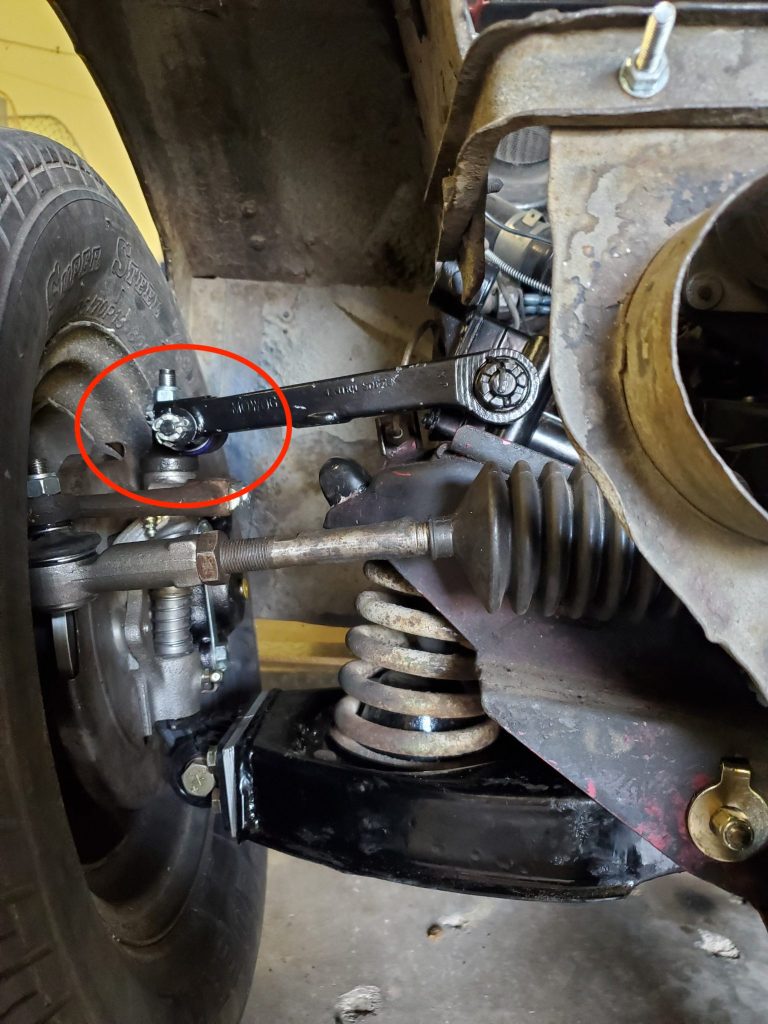
Notice the shock arm to trunnion connection above, circled in red. When it’s 180 degrees out of phase, you end up with extreme positive camber and steering arms that won’t reach. Below the issue is corrected with the trunnions on the right way round.
Note the threads showing next to the tie rod end in both photos. When the camber is this far off, the tie rods are almost completely unscrewed from the steering rack ends…
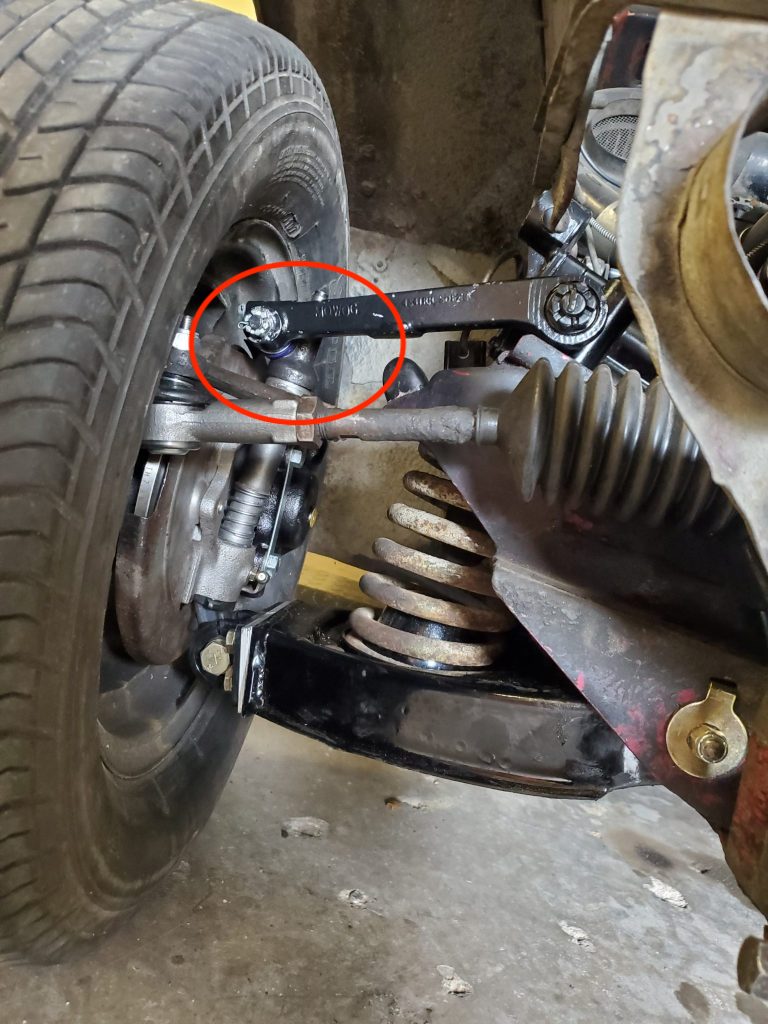
Doing a disk brake conversion? These photos will help. And you can buy our disk conversion kit by clicking here. You can also see our adjustable camber control arms in these photos… they help add negative camber for better performance, but of course you have to start with the correct geometry as shown here. The silver shims on the lower control arm change the camber as needed.
You can find our adjustable arms by clicking here.
Thanks to all who have donated photos to help the community get it right!
Good evening! How do you like your Bumper cooked? Well done?
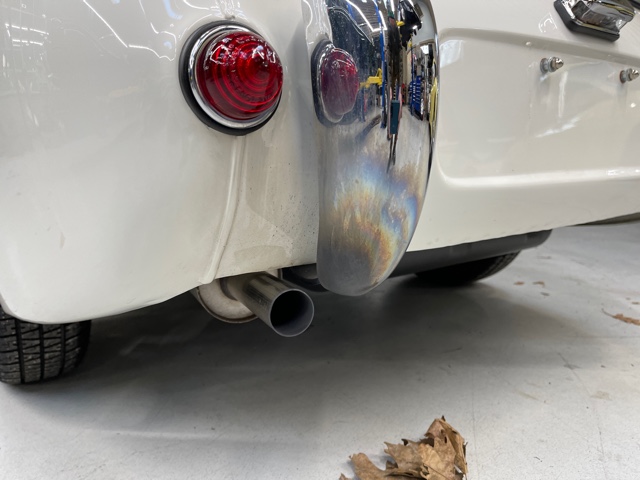
This exhaust system was improperly installed. The tail pipe ended up just shy of the body. A real bumper might have been up to the job, but a Bumperette? No way.
Burnt. Toasted. Blued. Heat and emissions have burned the chrome. We’ve scrapped a lot of dented rear overriders over the years. This is the first one we’ve had to discard because it was overcooked.
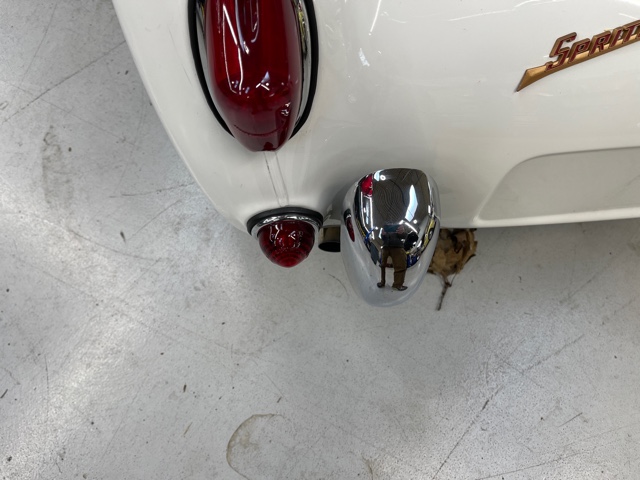
We have a slick muffler you can trim to fit, so you can make sure you don’t have this problem (Click here to purchase). For this particular car, we’ll use a chrome extension tail pipe extension as a band-aide to send the heat and smoke a bit further back, to spare the new bumper from another hot foot!
