


In this post, I share suggestions about dashboard restoration.
Most Sprites suffer from failing vinyl original covering, that has been weathered or otherwise abused. A new dashboard cover really transforms the look of any Spridget.
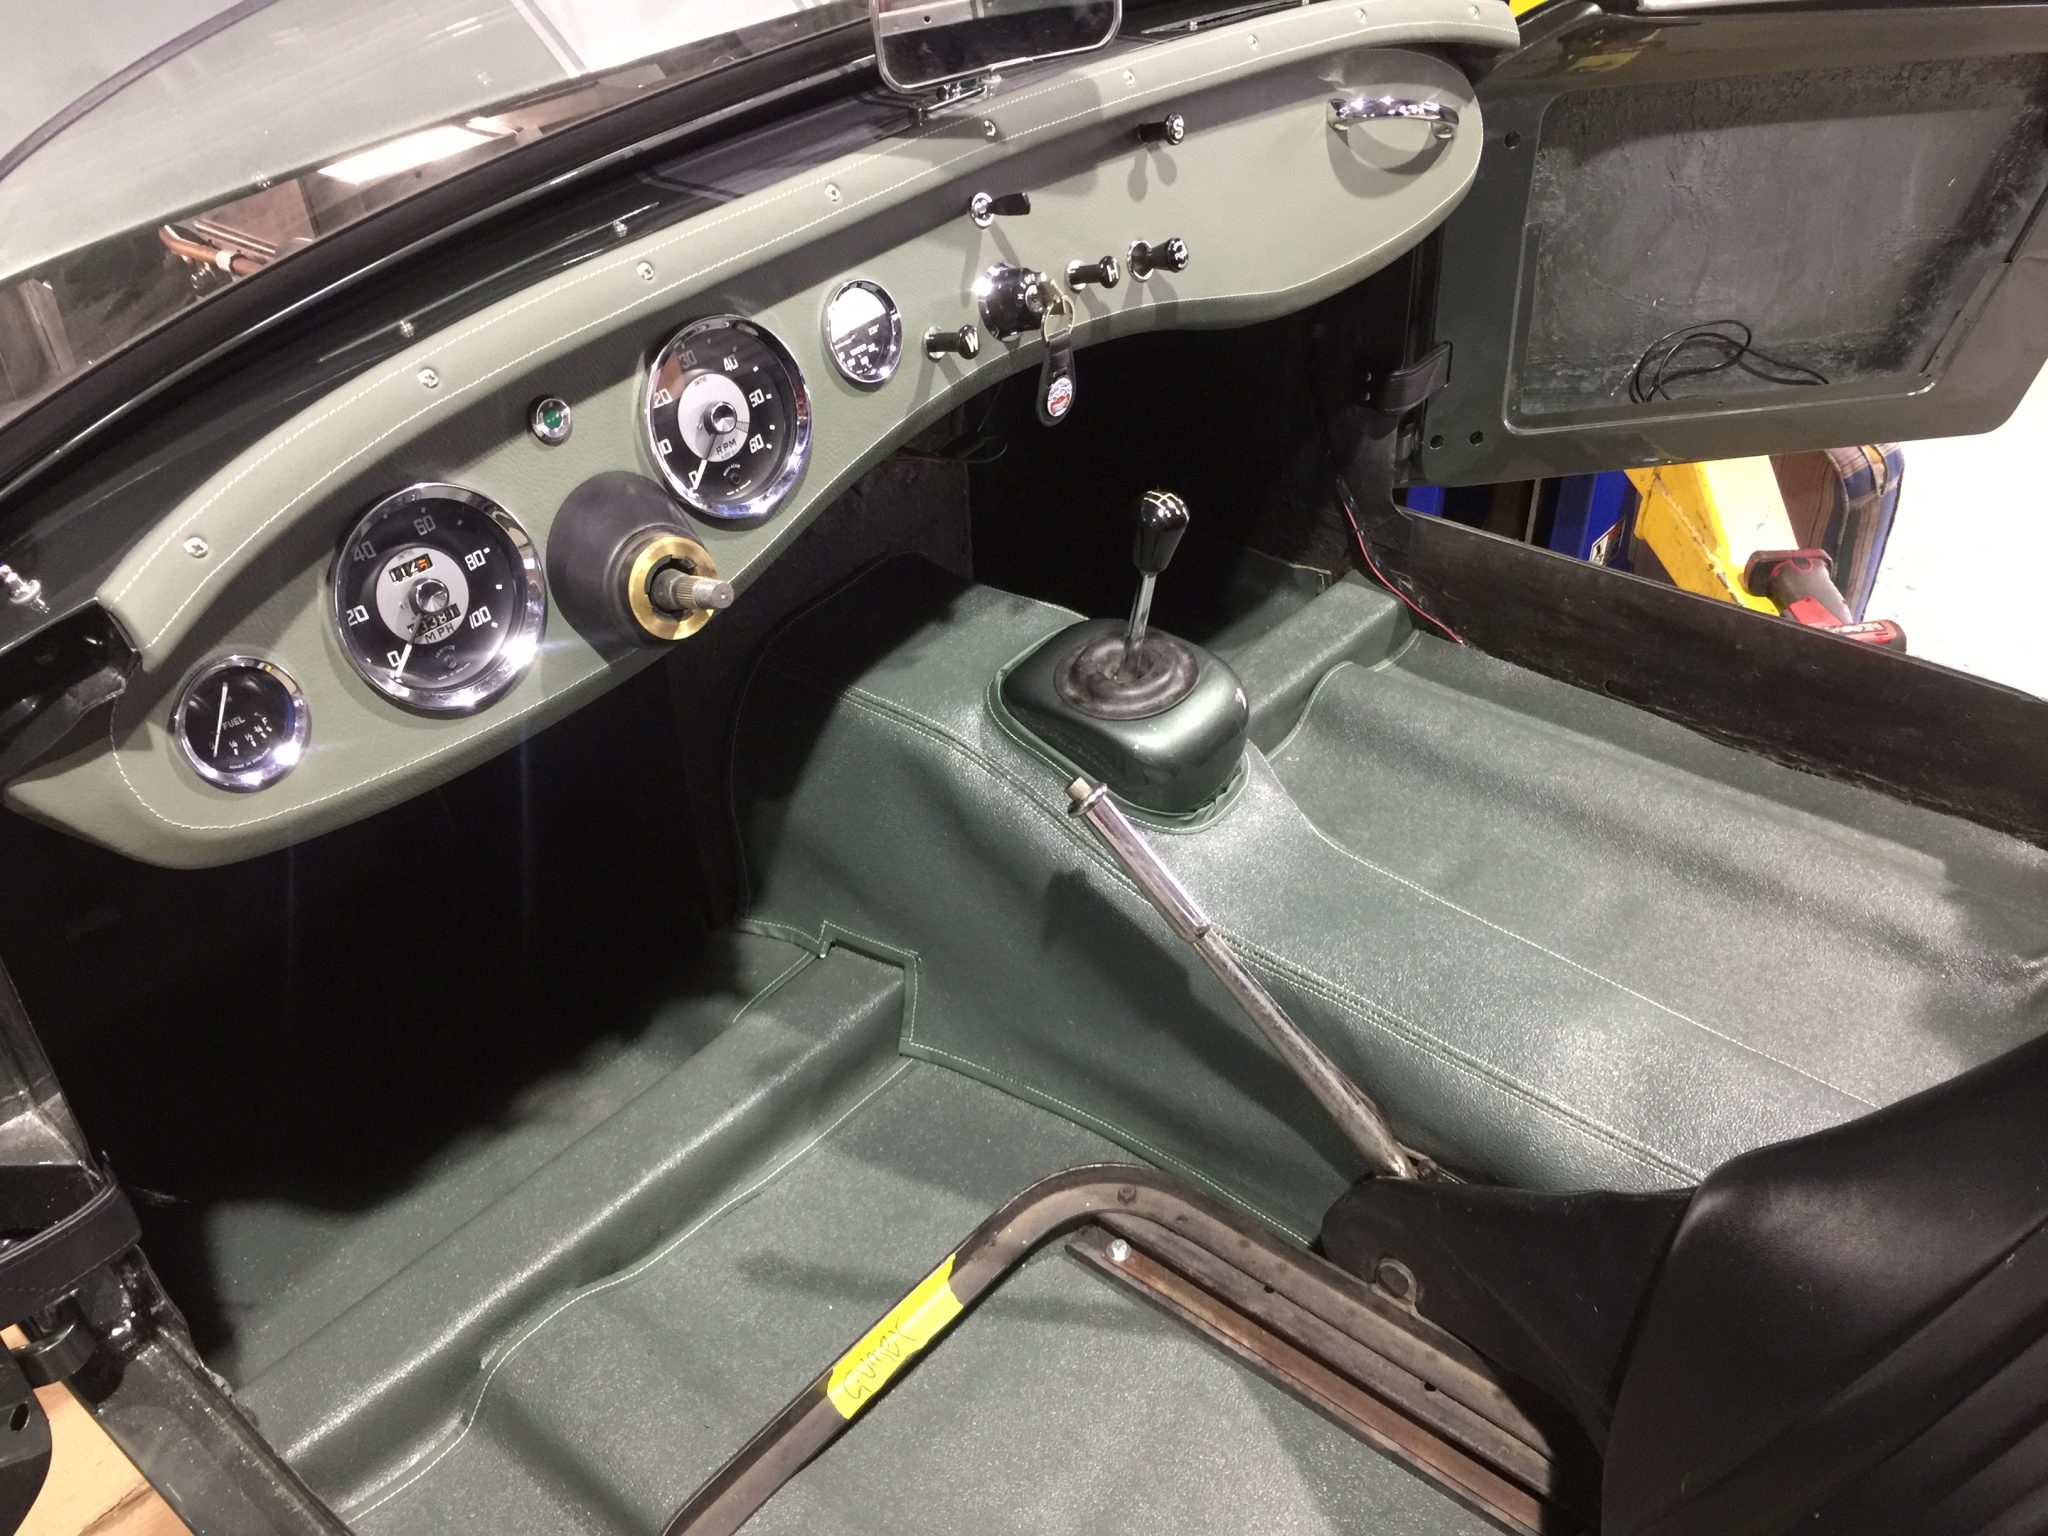
We normally strive for completely stock dashboards. In the case of my personal car “Gumby,” (above) we used a custom leather cover, further enhanced with custom stitching. But all the dials and switchgear is located in the stock positions, so that the original flavor is preserved. Each job is a bit different, and since Gumby is fuel injected, you’ll notice that the choke hole/knob is missing. Otherwise, it’s important to keep things as close to original as possible.
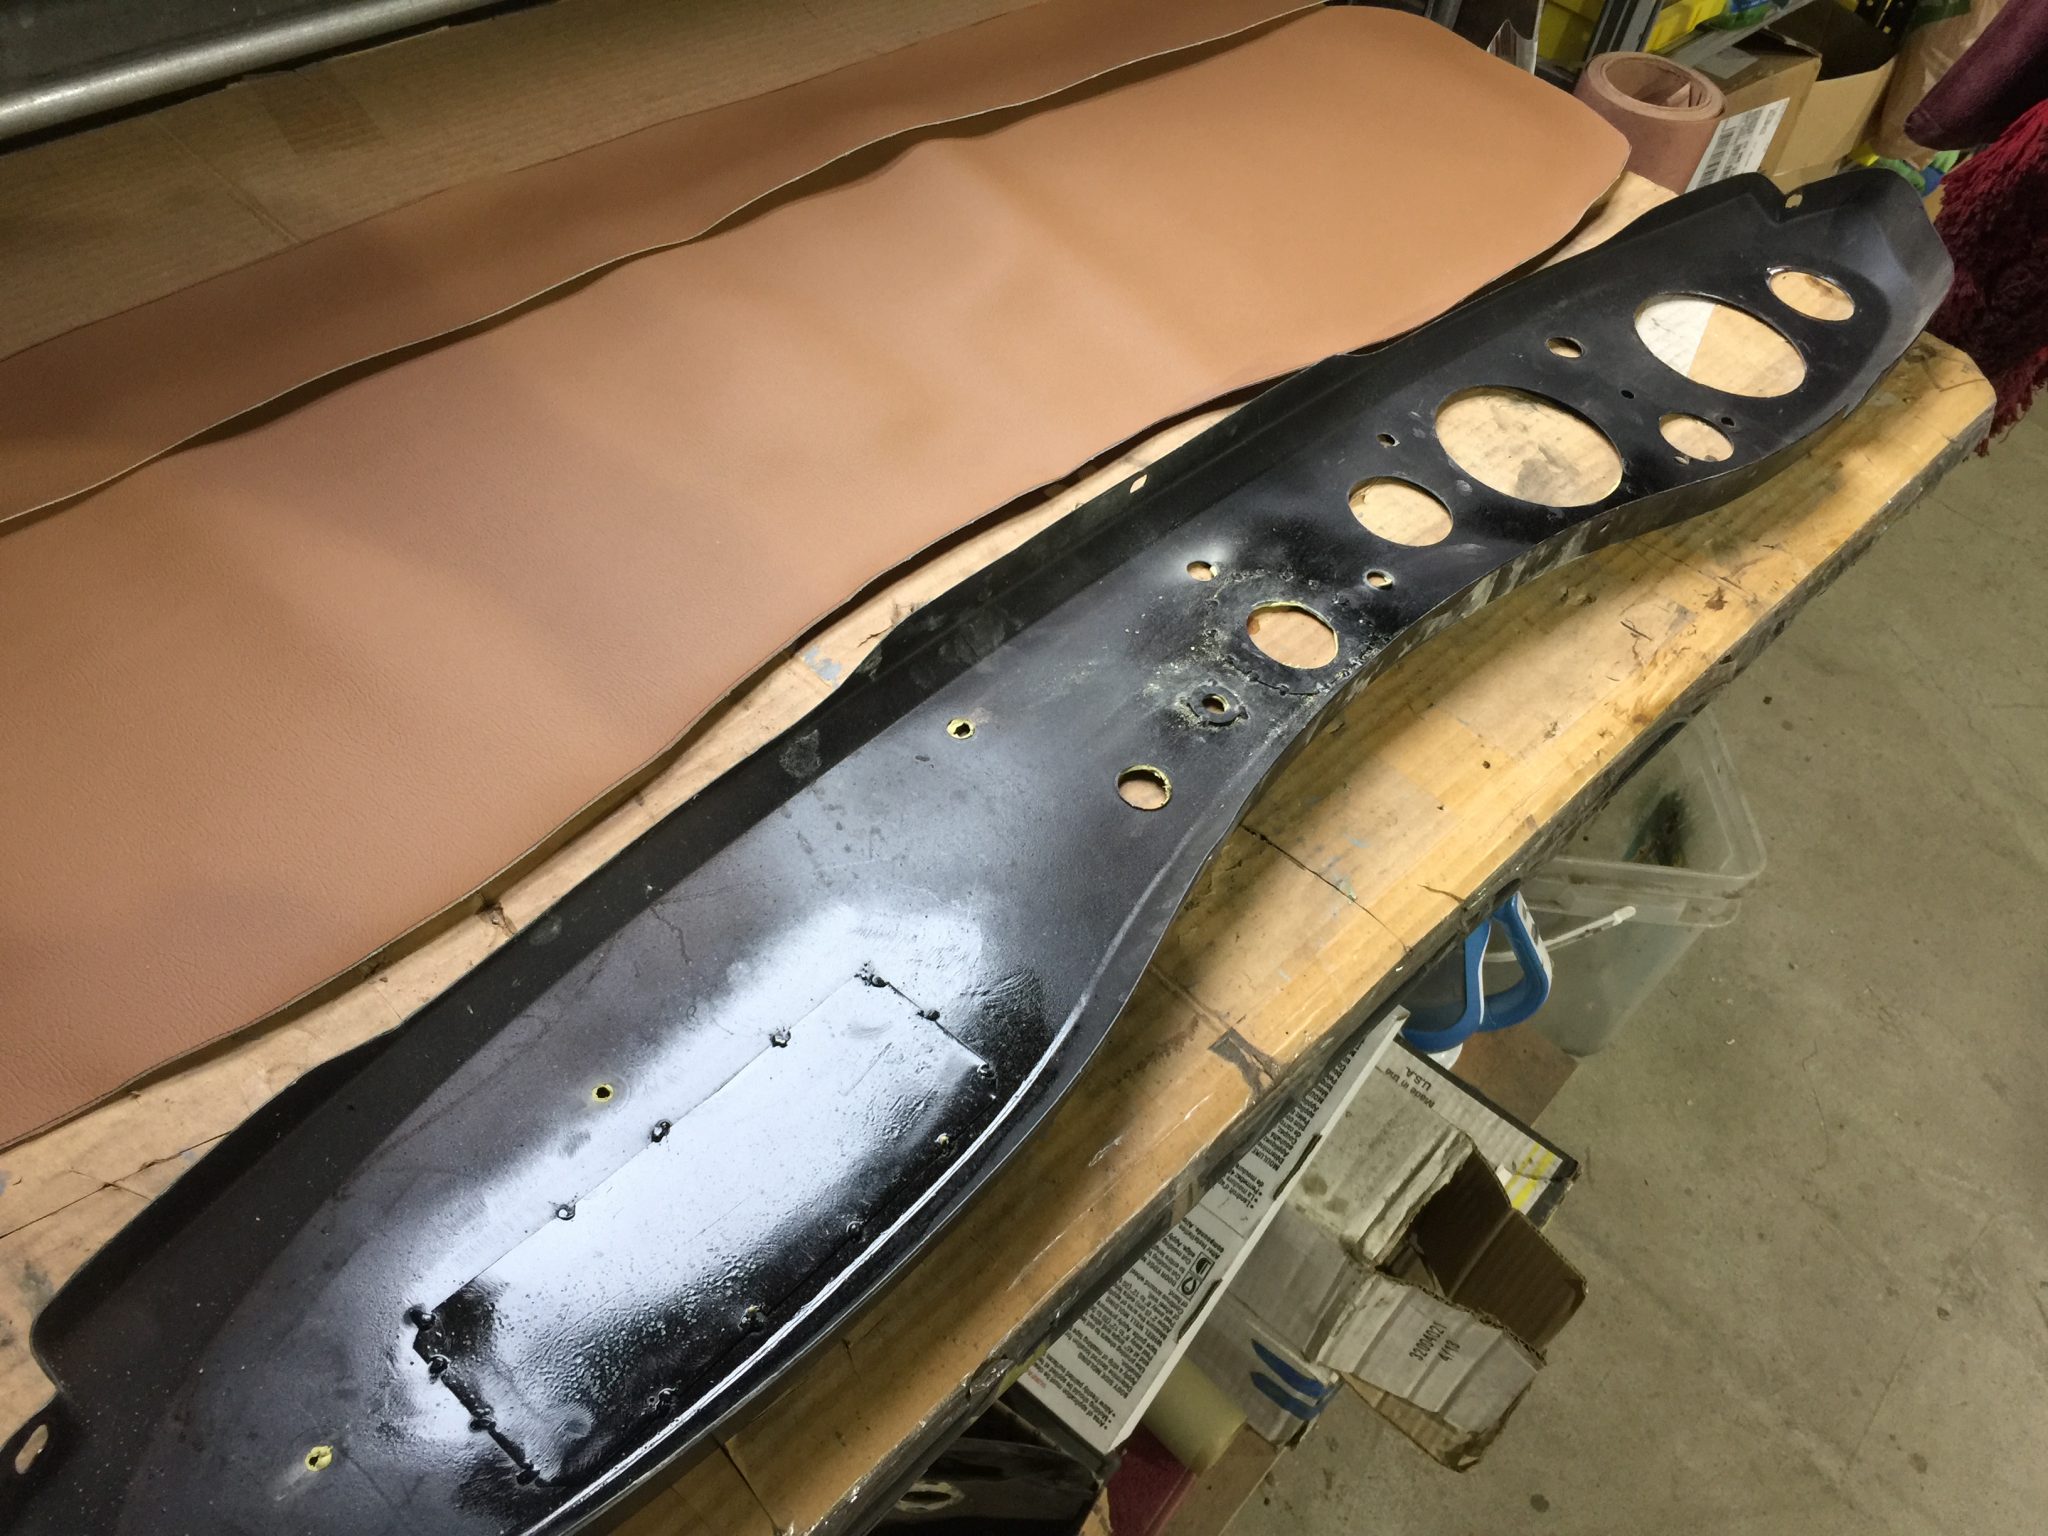
The hardest part of any recover job is to establish a great foundation. Almost all dashboards have been modified and drilled with errant holes. So the first step is to determine that holes are all in the correct places. If not, you have to weld and fill them to get it right.
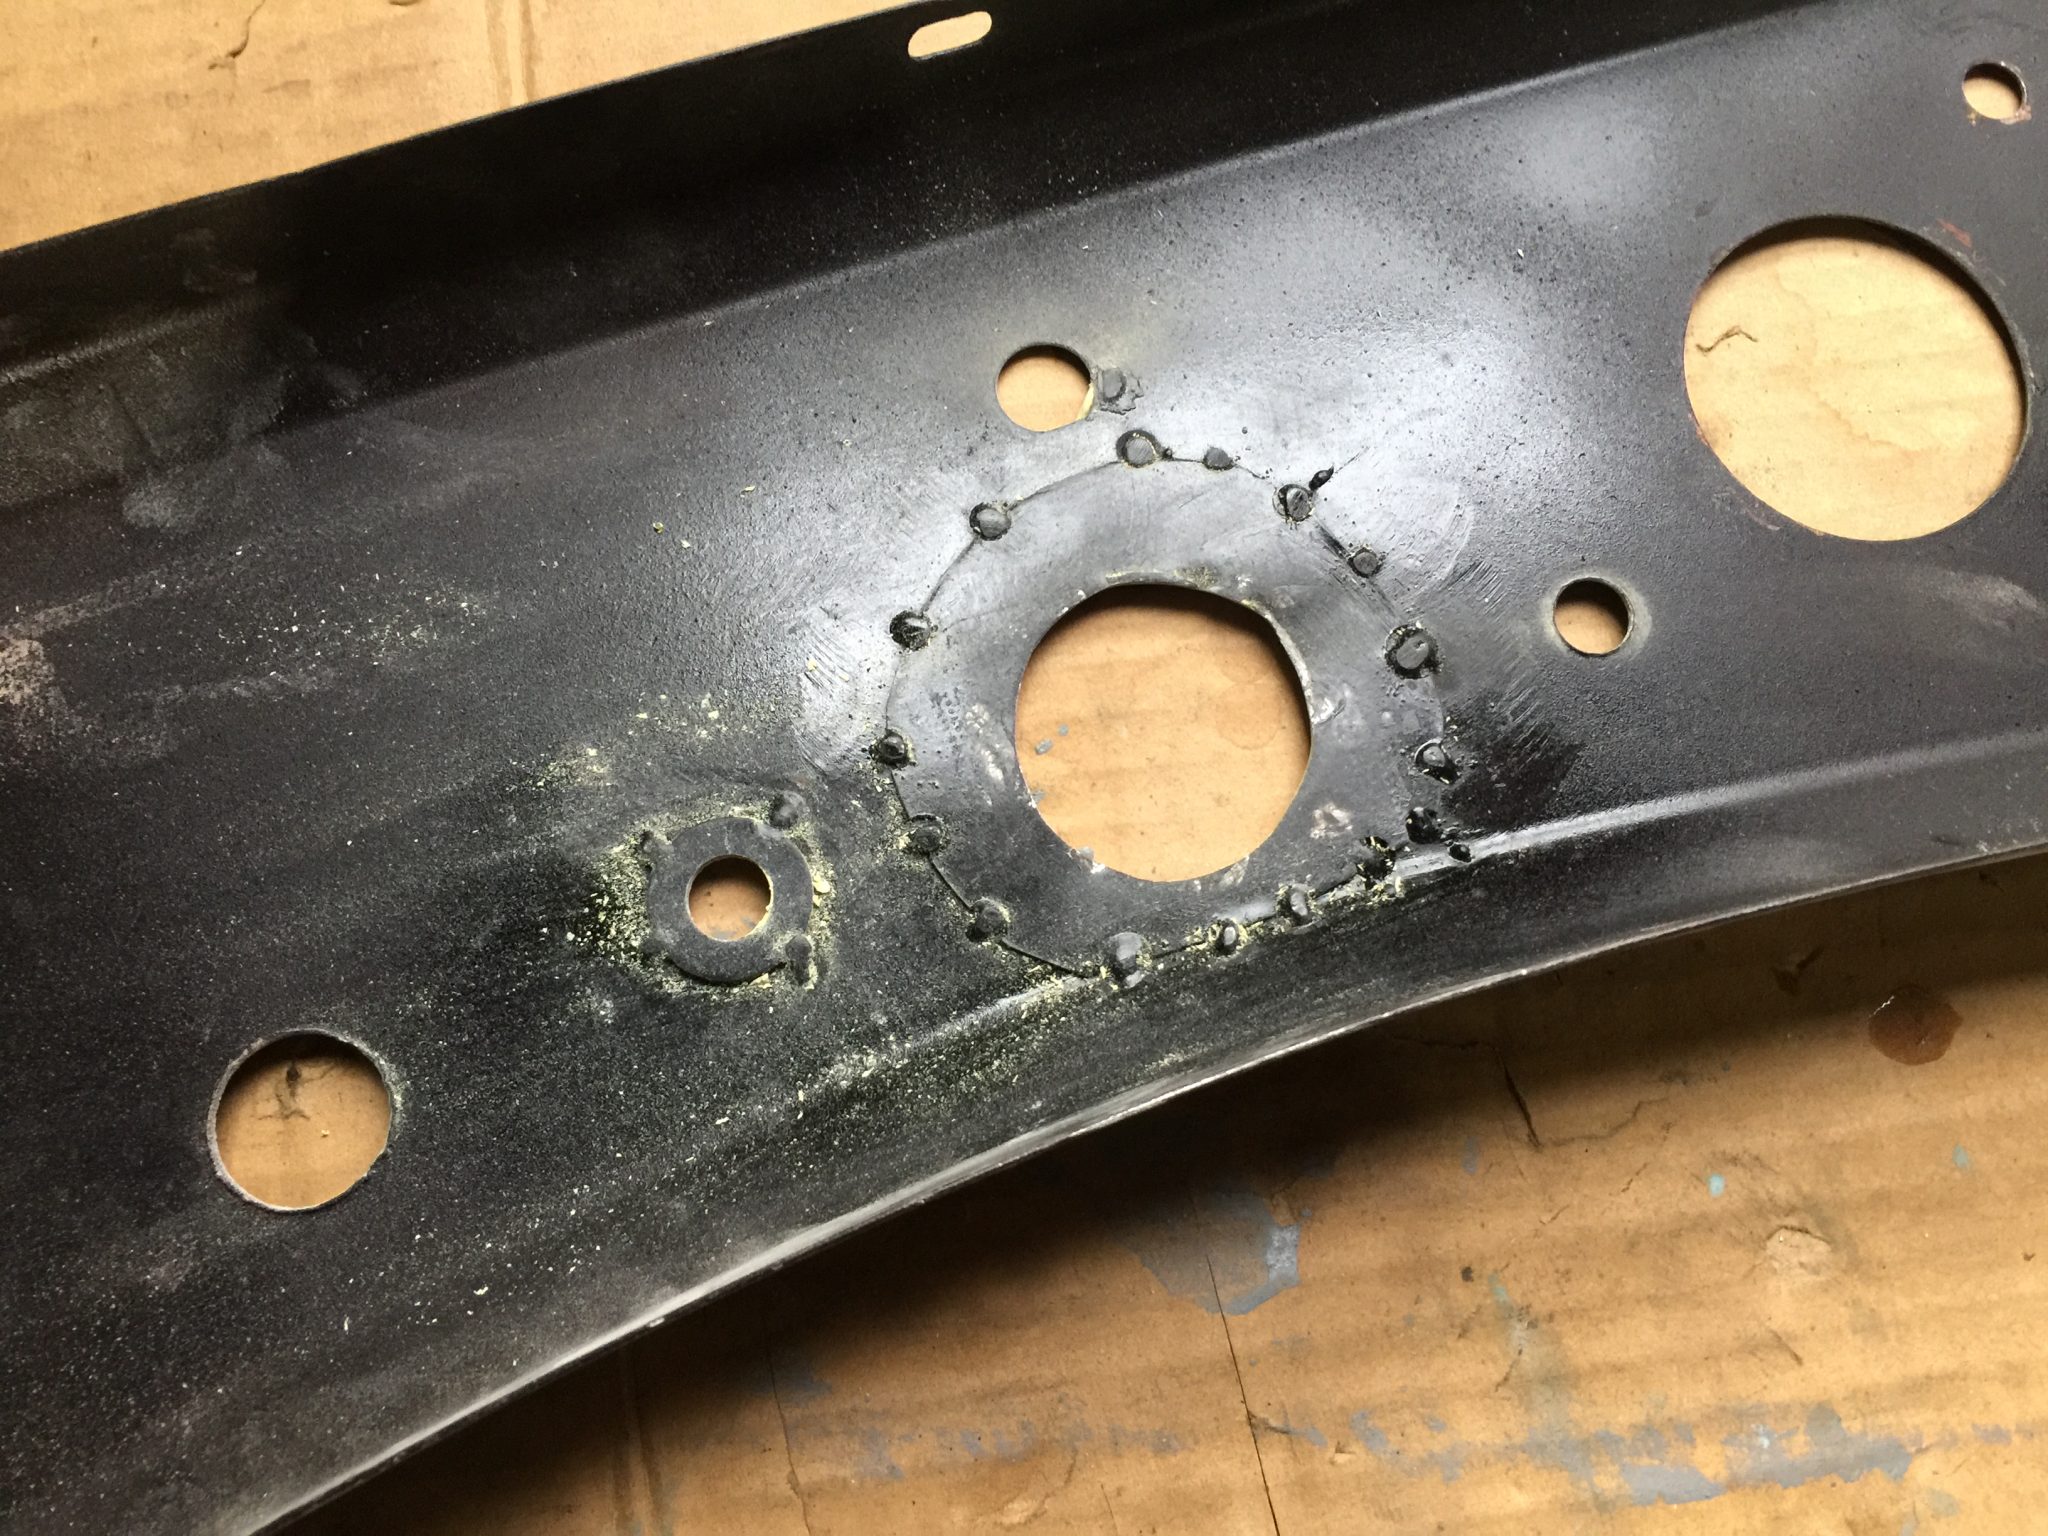 On the current dashboard we are restoring, there were only a few extra small holes underneath the speedometer. The heater control hole was also drilled out so we welded a washer on the back to accommodate the correct switch after restoration. The bigger challenge was an over-drilled the ignition switch hole, so we had to weld on a support that would allow the original type to be fit after recover is complete.
Particularly critical is that the sheet metal is absolutely flat, otherwise imperfections will telegraph through the new vinyl covering. We fill and sand the face to make sure we get the best result.

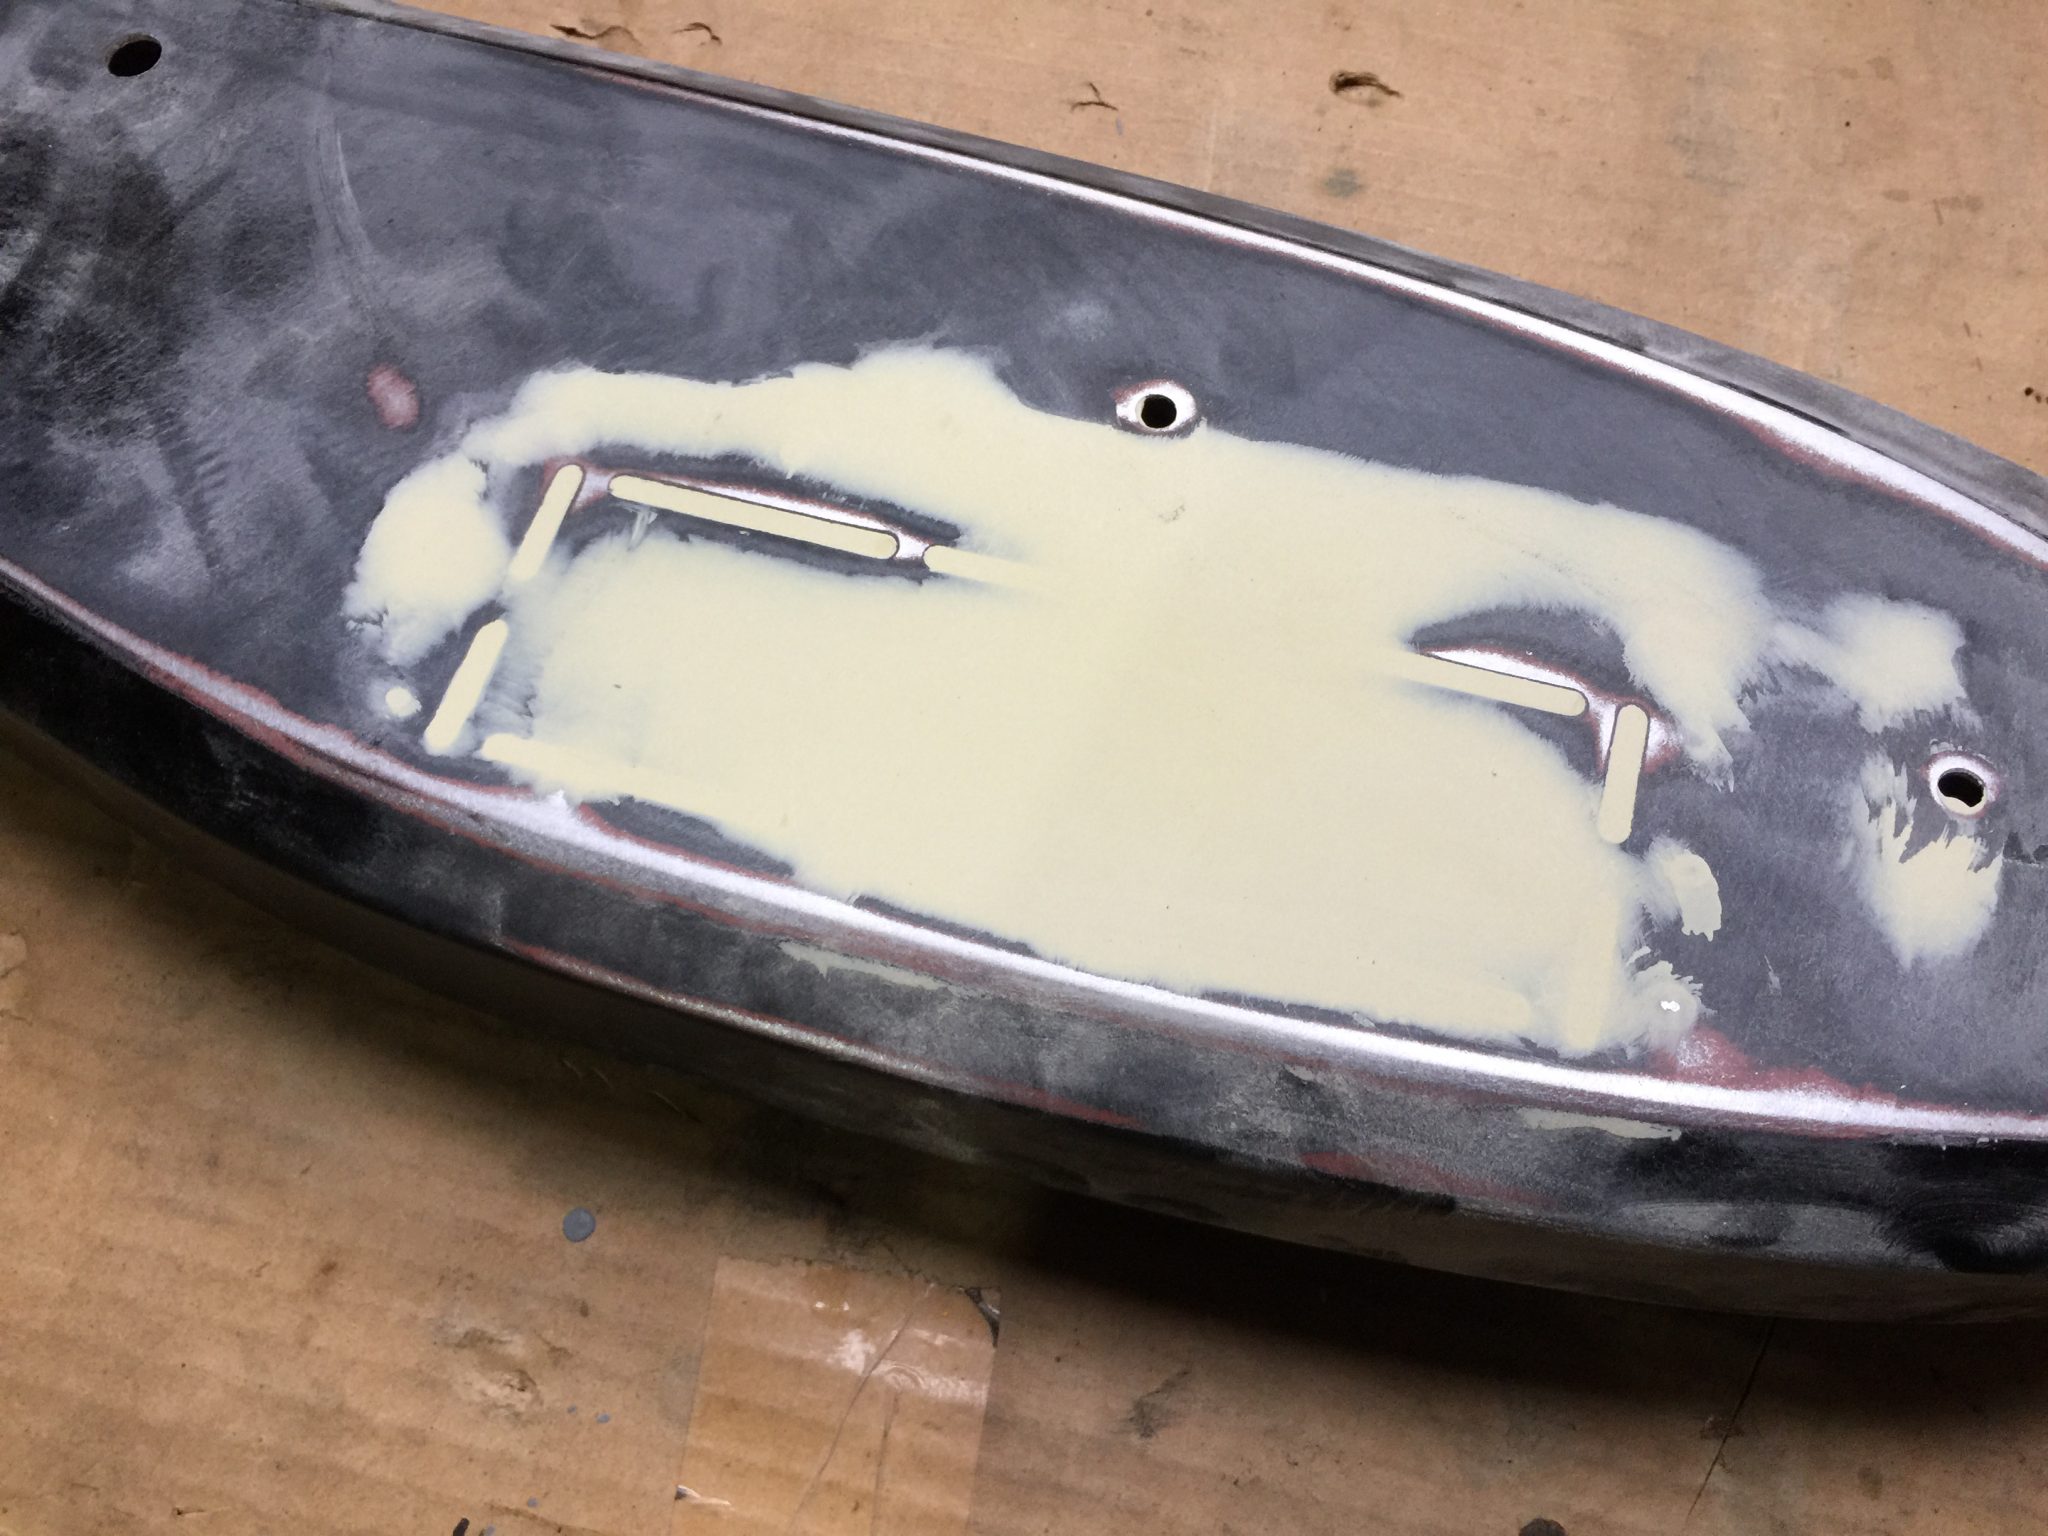
And finally, the radio perforations are a tricky and interesting topic. These are splendid to find unmolested, many cars have had radios (and CBs and eight-track players) fit, so the panels have been punched out by prior owners. So it is common to weld patches to this area.
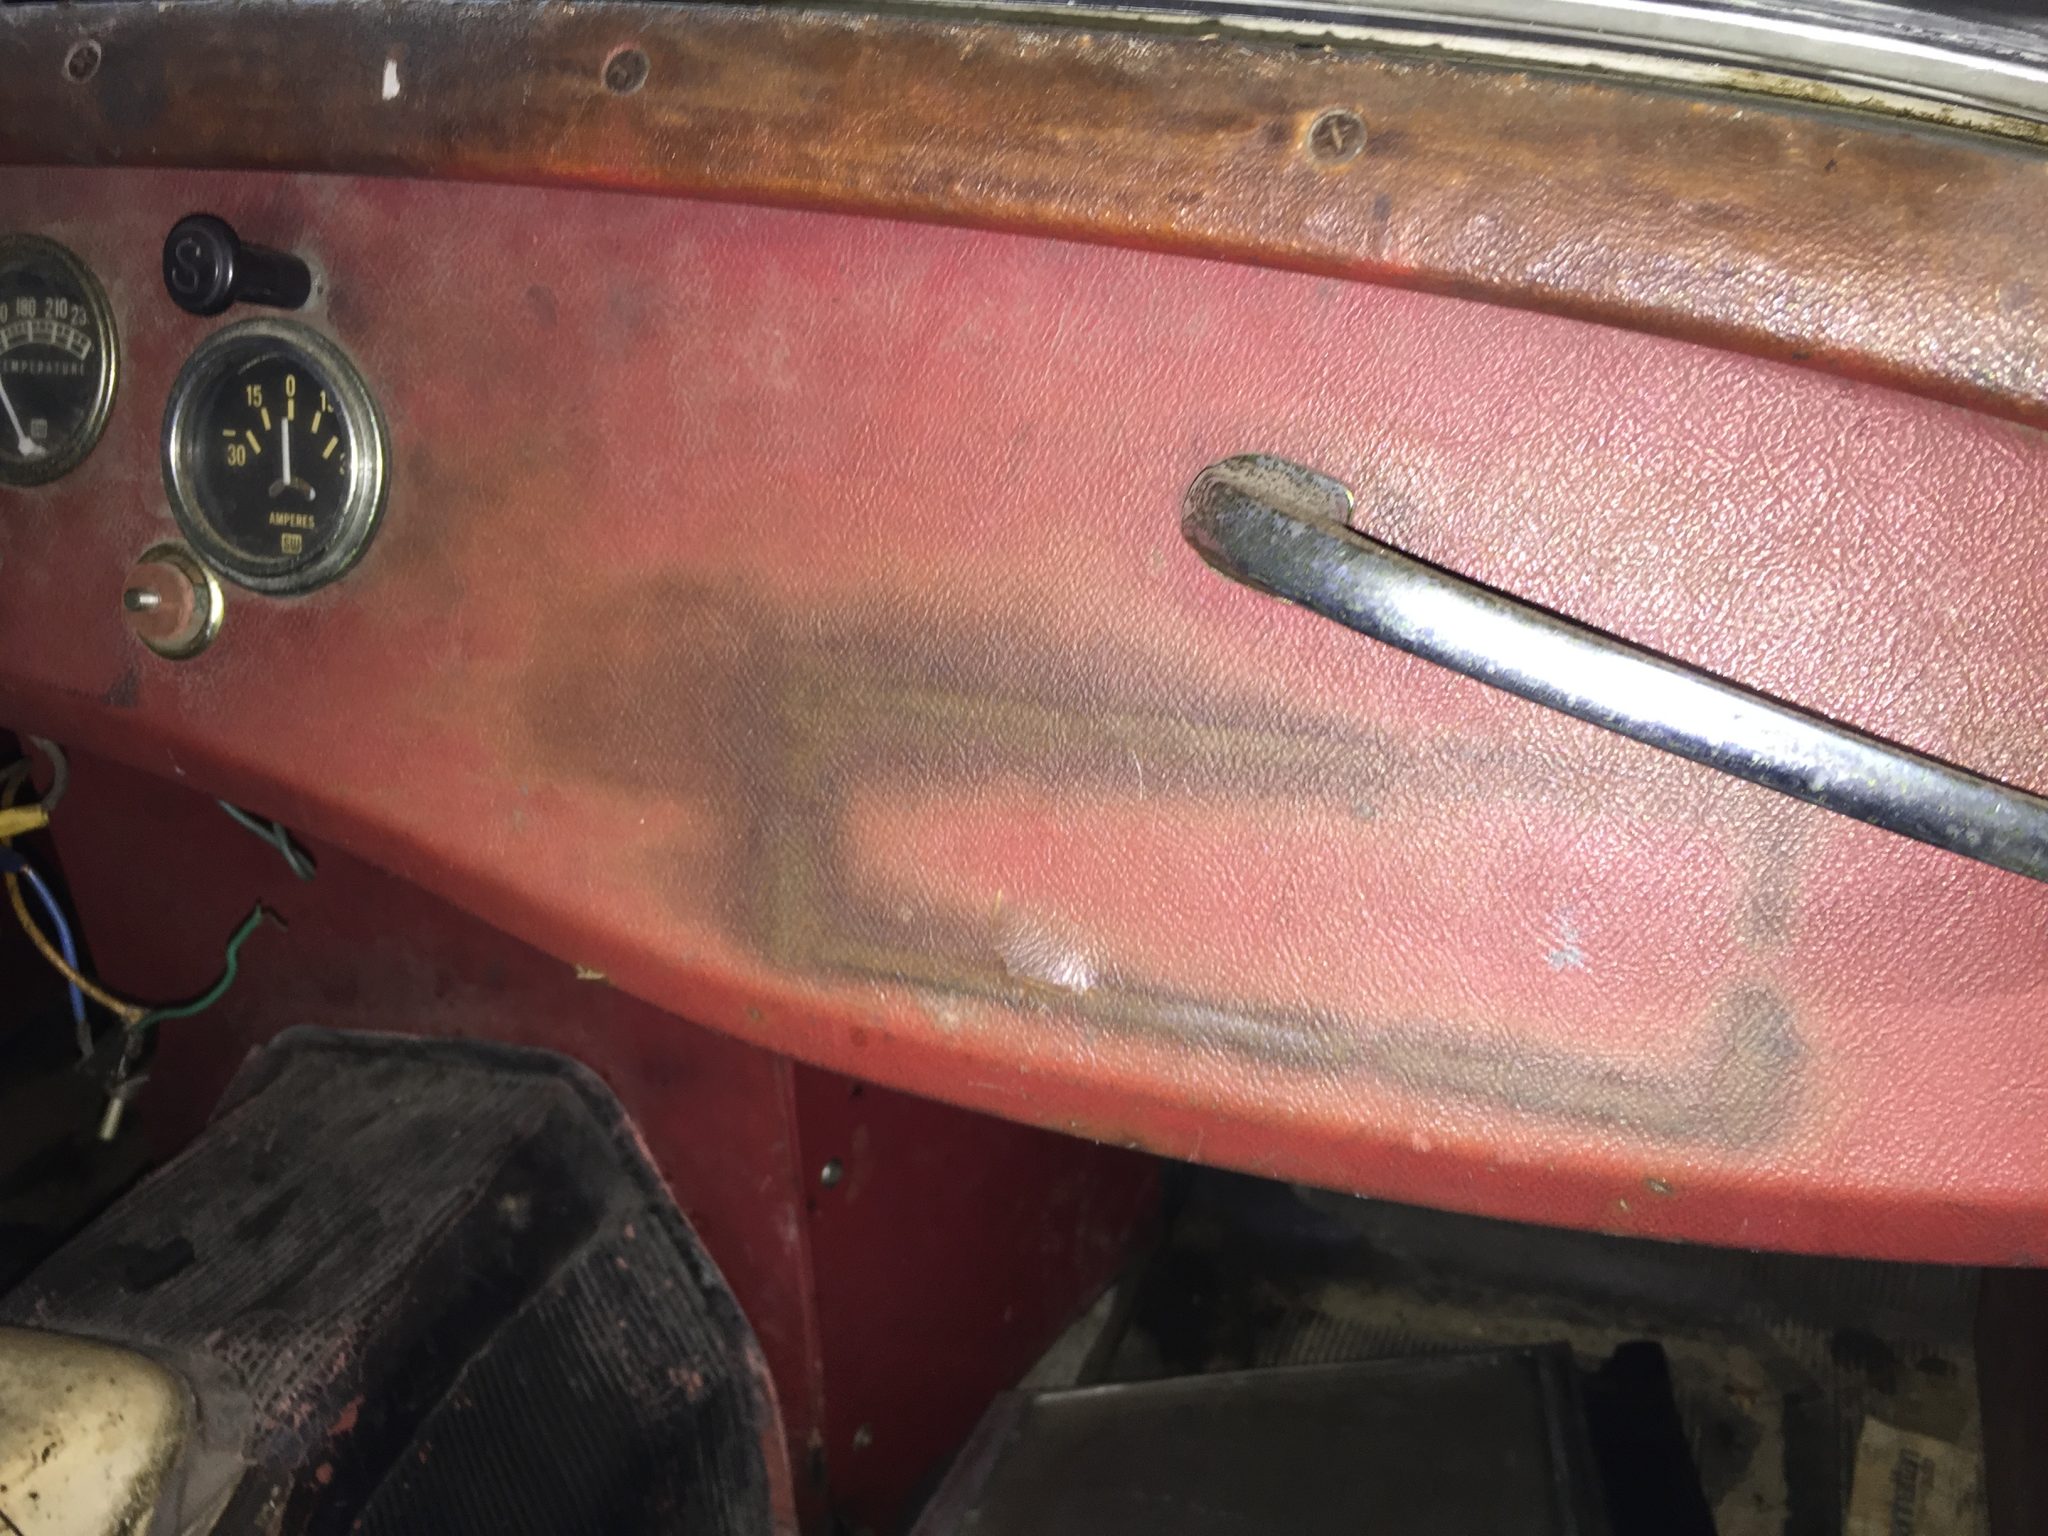
But what to do when you still have the original perforations in place? They are great to see but actually a liability when recovering your dash, because the can lead to discoloration of your nice new covering. Light, dirt and lack of support seem to make the fabric change over time, at a different rate than the rest of the flat dashboard. You can see the this shown in the photo below on an original dash and covering. Notice how the discoloration follows the original perforations.
What we did in this case, particularly since we are using a tan (non-stock) covering for this project, was to fill the perforations so that our restoration would have maximum longevity. (You can see the new covering laid on the bench above the dash in the photo below.) We tack welded a support behind and then used filler, which is then sanded, to get a smooth and uniform support for the new material. 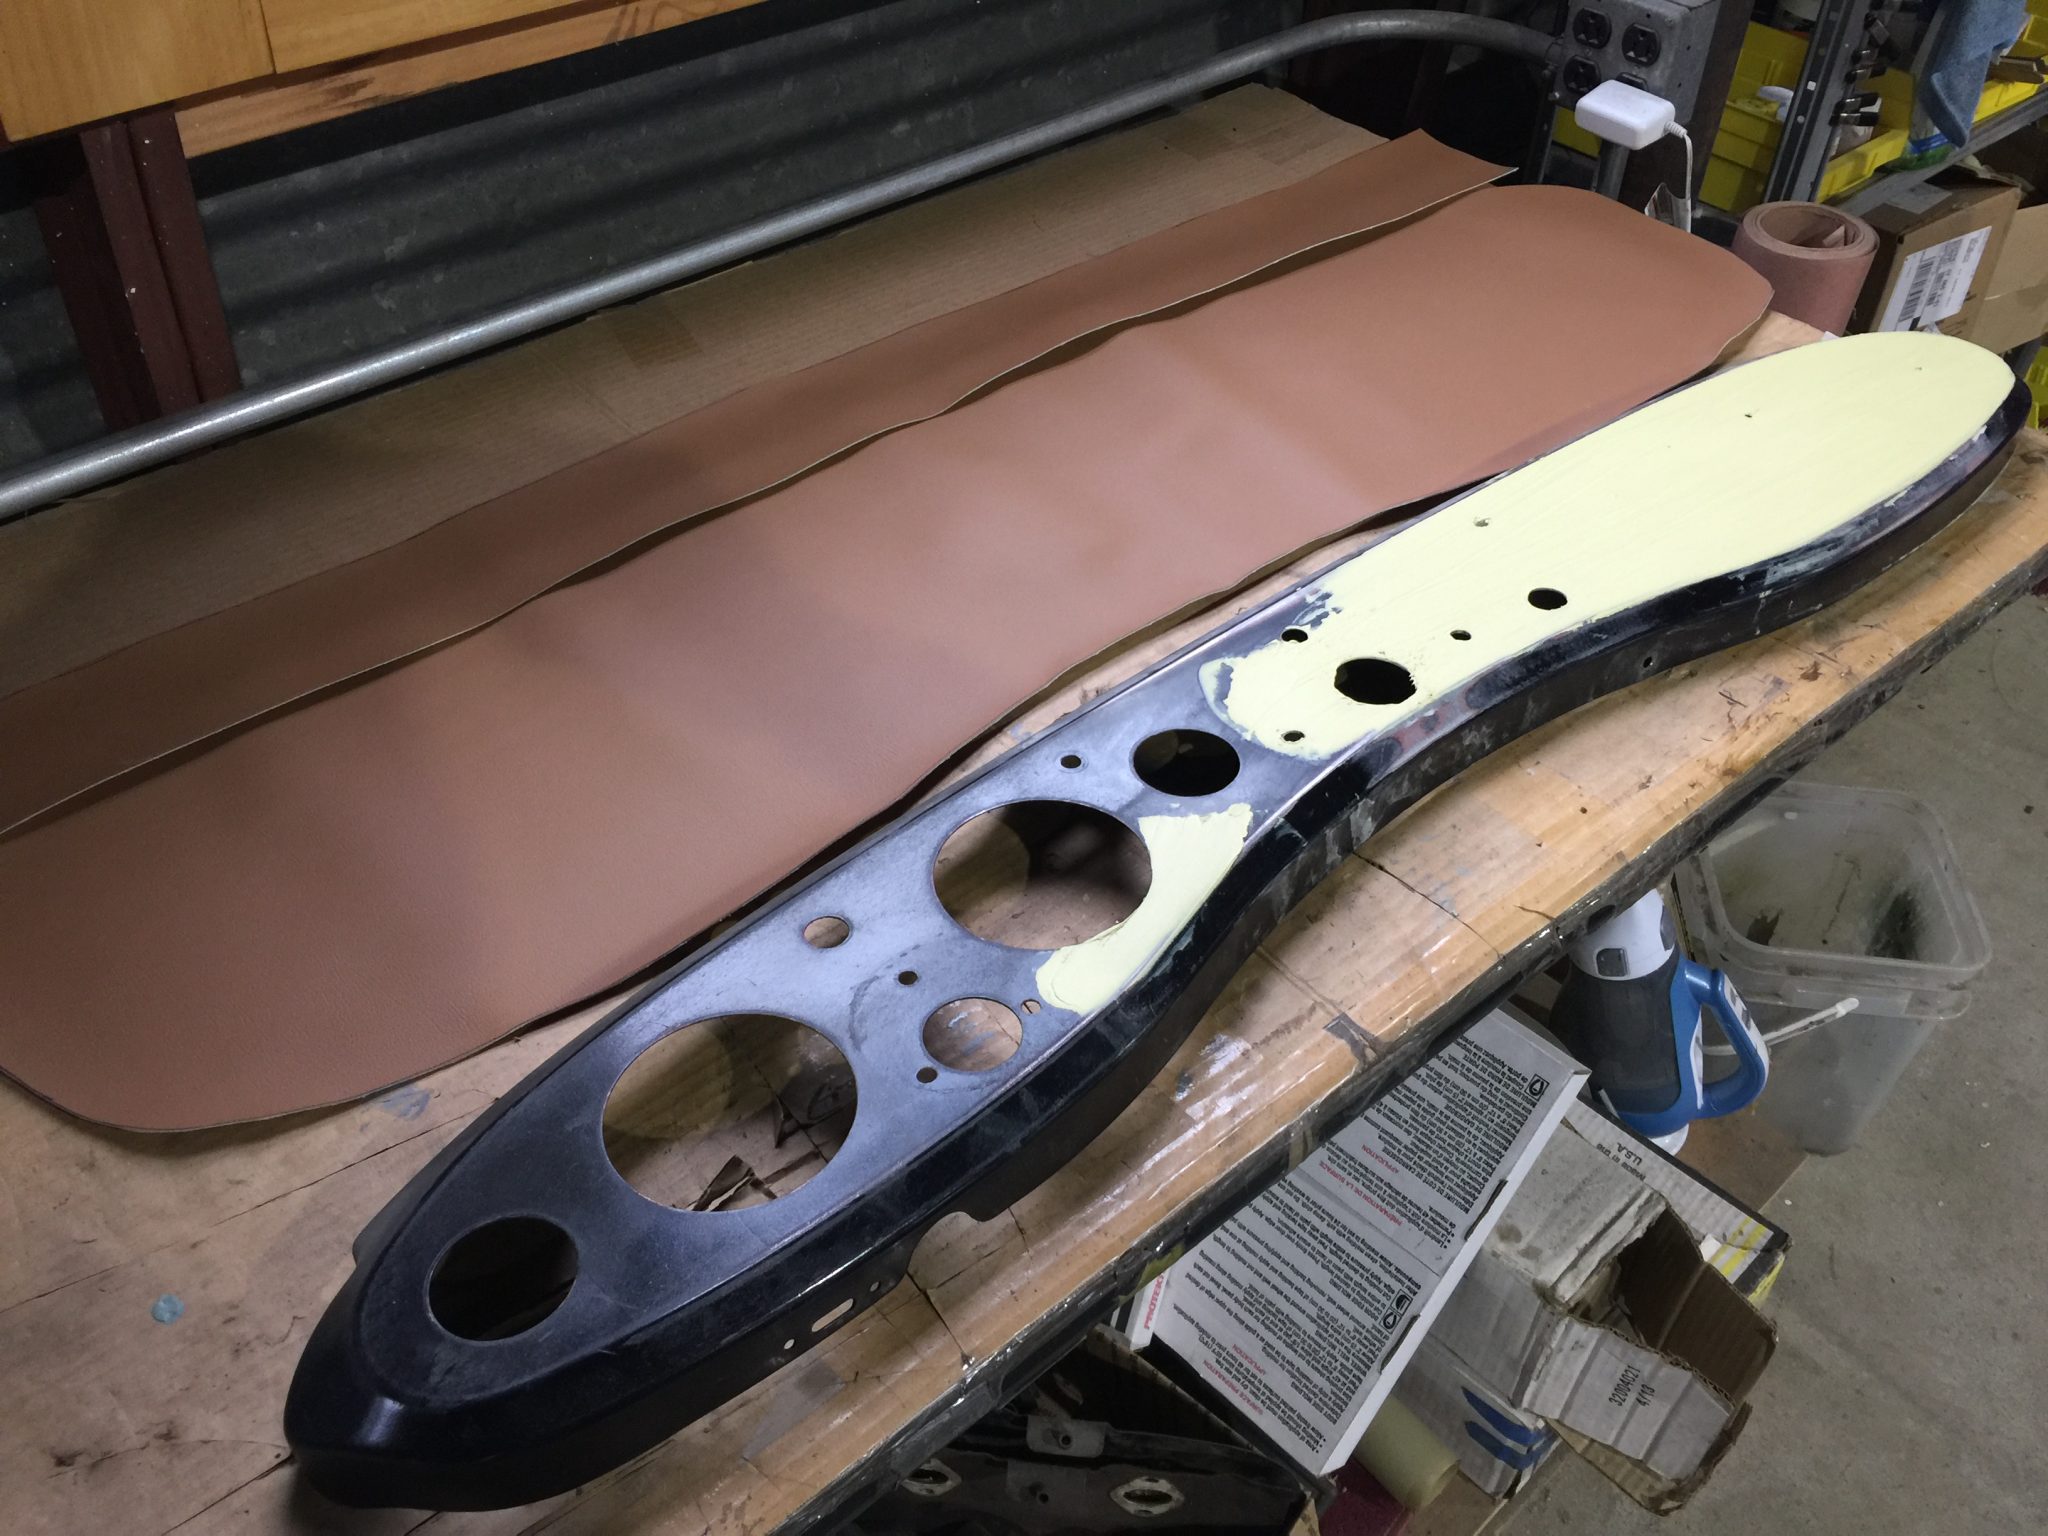
While it would be really nice to simply leave the perforations open just like they were from the factory, the first time someone fondles the original depressions and stretches the new vinyl covering thus deforming that new material, they are no longer attractive at all! So to protect this restoration investment, we generally choose to fill the original slots. Of course, for a concours restoration this would be a mistake, you need to leave the slots open (if you have them). And if you are a purist and want your car factory correct in every way, do not do this.

At left is a photo of the dashboard recovered. Notice the a nice flat surface on the right portion of the dashboard. The wrinkles on the left side will all disappear once the gauge holes are cut-out. Again, this is a non-stock tan color on a non-stock car so we chose to fill the perforations for the best finished (flat) result.
We sell all the correct pieces for your dashboard restoration. You can find our dash rehab kit by clicking here.
